How to make
sweet cotton candy charms
out of polymer clay.
1. What you need: preferably two colours of polymer clay
(I went for glitter white and raspberry from Fimo), a toothpick,
something to cut your polymer clay with , an eye pin and, not shown in
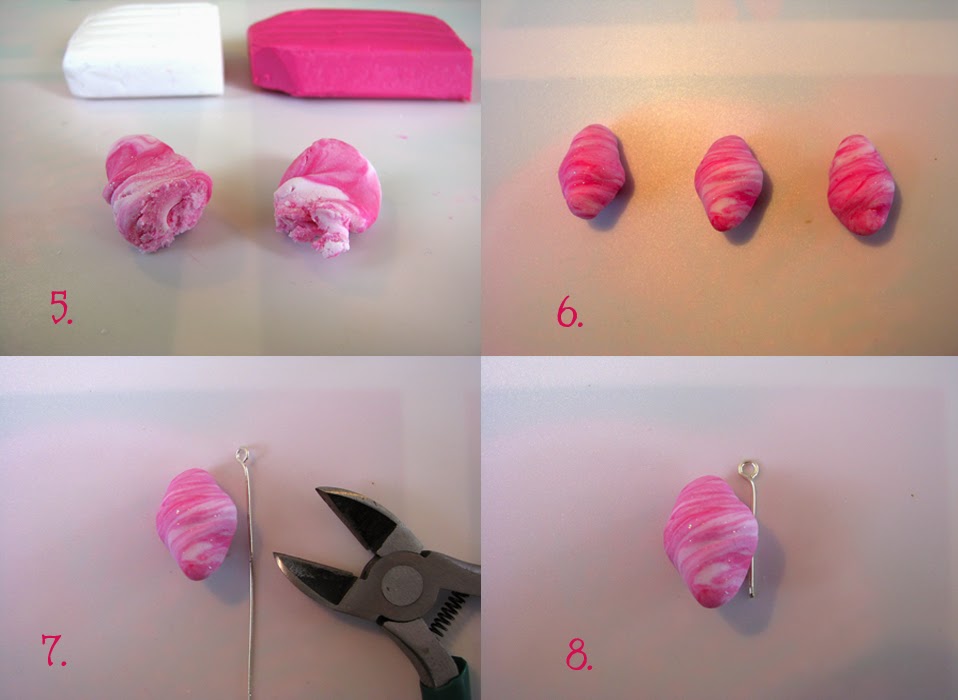
the picture because I forgot to put it there, a wire cutter (picture 7)
and a plier to bend your eyepin with (picture 9).
2. If you go for a white/other colour combination like I did then cut off about double as much white clay then the other colour.
But really it is up to personal taste what colours the cotton candy is supposed to be.
Condition
your clay until it is easy to use. I found that leaving it a bit harder
works rather well for this project, it gives the cotton candy a bit
more texture.
3+4. Wrap the white clay around the coloured clay so that it is completely encased.
5.
In a twisting motion, mix the two colours a bit until you get a nice
streaky effect that resembles cotton candy. Its best to only twist in
one direction, that way you get the nice spiraly streaks.
6. Form a cotton candy out of the clay. I think it looks a bit like a chewing gum ^^
7+8. Take the eye pin and cut it to almost the length of the cotton candy.
9. Bend the lower end of the eye pin into an L-shape.
10.+11+12.
Twist the eye pin into the cotton candy like shown, that way it will
never fall out and you don't have to hassle with glue later. Bring the
cotton candy into form again in case it gets squeezed a bit.
13. Stick the toothpick into the cotton candy.
14. Baking time. Bake the cotton candy with the wooden toothpick for 25-30 minutes at
110° Celcius/ 230° Fahrenheit.
15. Take the wire cutter and cut the toothpick to your desired length.
16.
I found that the toothpick doesn't come out of the cotton candy even
with trying my best to pull it out again, so I didn't use glue. In case
your toothpick comes out easily I would suggest using a drop of glue to
get it to stay in place (jewelry glue shouldn't react with polymer clay
so that is recommended.
I
didn't use varnish on my cotton candies because I like the textured
look it has (the glitter in the clay gives more texture to it too!)
Feel free to use varnish though, maybe with some glitter,
there is no such thing as too much glitter! : )


